
Installing Green Sukabumi Stone: A Must-Read Before You Start!
You’ve probably seen those gorgeous pools with shimmering green tiles. They look luxurious, refreshing, and timeless. But did you know that installing Green Sukabumi stone the wrong way can lead to cracks, stains, and expensive repairs?
Yes, you heard that right. Many people assume that natural stone installation is as simple as placing tiles on the ground. But one small mistake can ruin your investment.
If you’re planning to use Sukabumi stone installation for your pool, this guide will save you from a nightmare. Let’s get into it.
Benefits of Installing Green Sukabumi Stone in Pools
Why is everyone talking about Sukabumi stone installation? Simple. It’s not just beautiful—it’s functional.
1. Keeps the pool cool
Sukabumi stone naturally absorbs less heat, so your pool remains refreshingly cool, even on scorching days.
2. Self-cleaning properties
It contains zeolite, which helps purify water by reducing bacteria and algae growth.
3. Extreme durability
Unlike ordinary tiles, it withstands harsh weather, chemicals, and heavy foot traffic.
4. Luxurious appeal
Its natural green shades blend perfectly with outdoor landscapes, making pools look exotic and high-end.
But here’s the catch: all these benefits disappear if you don’t install it correctly.
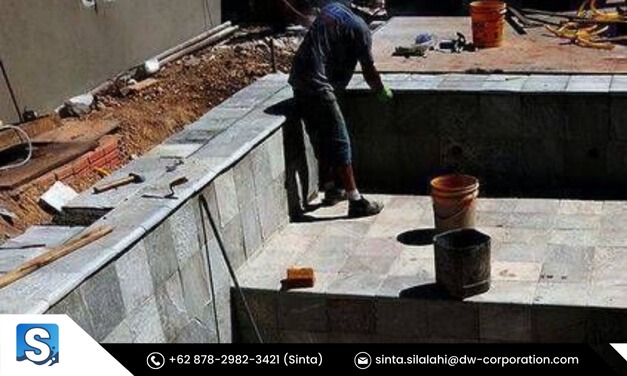
Step-by-Step Guide to Installing Green Sukabumi Stone for Pools

Produk : Green Sukabumi | Image : Johnny Bueno
So, how do you ensure a flawless natural stone installation? Follow these steps:
Step 1: Choose the Right Stones
Not all Sukabumi green stone pool tiles are the same. Some sellers mix fake or low-grade stones with real ones. Always buy from trusted suppliers.
Step 2: Prepare the Surface
A weak foundation means disaster. Make sure the surface is level, dry, and free from debris. Waterproofing is a must to prevent moisture damage.
Step 3: Use the Right Adhesive
Ordinary cement won’t work. Use a flexible, water-resistant adhesive designed for Sukabumi stone installation.
Step 4: Lay the Stones Carefully
Spacing is key. If tiles are too close, they crack. Too far apart? Water seeps in. Follow proper alignment for a smooth finish.
Step 5: Sealing and Finishing After Installing Green Sukabumi Stone
Skipping this step is like leaving your phone outside in the rain. A good sealant protects against stains, water absorption, and wear.
Common Mistakes in Installing Green Sukabumi Stone
Let’s talk about the biggest blunders people make when installing Green Sukabumi stone. Avoid these at all costs:
1. Skipping waterproofing
Water damage weakens the stone over time.
2. Using the Wrong Adhesive for Installing Green Sukabumi Stone
Weak glue means loose tiles and cracks.
3. Forgetting to seal the stone
Without protection, stains and algae take over.
4. Rushing the process
Proper installation takes time. If a contractor promises a “one-day job,” be cautious.
How to Maintain Your Sukabumi Green Stone Pool
Product : Green Sukabumi | Image : Alicia
Congratulations, your Sukabumi stone installation is complete! Now, how do you keep it looking new?
1. Clean regularly
Use mild, non-acidic cleaners to prevent discoloration.
2. Reseal every 1-2 years
This keeps water and stains from penetrating the stone.
3. Avoid harsh chemicals
Some pool cleaners can damage the stone’s natural properties.
Ignoring maintenance can lead to expensive restoration later. Stay ahead with simple care!
Conclusion
If you’re planning on installing Green Sukabumi stone, do it right the first time. One mistake can cost you thousands in repairs.
Choose high-quality stones, follow proper installation steps, and never skip sealing. Your dream pool deserves the best!
Read also: 5 Black Lava Stone Ideas for Your Beloved Home
For more information, contact us via WhatsApp +6287829823421 (Sinta) or email sinta.silalahi@dw-corporation.com. We are ready to answer your questions and provide all the information you need.


